DOSBox Pure
A downloadable emulator
If you plan to donate via PayPal, PLEASE consider doing it directly to me via this link to avoid Itch taking away 50%. Thank you.
|
DOSBox Pure is a fork of DOSBox, an emulator for DOS games, aiming for simplicity and ease of use. This project is a standalone version of the RetroArch core for desktop platforms. DownloadYou can download the latest version of DOSBox Pure for free on this page (donations welcome!). Just extract the ZIP file and then run DOSBoxPure.exe. On macOS if you get an error that the program is damaged or otherwise can't be run, you need to open the Terminal app and execute this command to allow it to be executed: xattr -dr com.apple.quarantine /Applications/DOSBoxPure.app Loading ContentDOSBox Pure can load ZIP files, CD images (ISO or CUE), floppy/hard disk images (IMG/IMA/VHD/JRC), DOS executable files (EXE/BAT/COM), legacy DOSBox .conf files or folders directly. It also loads .DOSZ files which are just .ZIP files with a different extension. There are 3 ways to load content. After startup, you can use the "Load Content" menu option to navigate to the file you want to load. Alternatively you can drag & drop a supported file onto the program window (after starting) or onto the program's icon (before starting). HotkeysA few system functions are bound to various F-keys, accessible while holding the hotkey modifier which by default is the Control key. The hotkey modifier can be changed in the System Settings. These are the hotkeys:
Use the
In addition, you can set the | 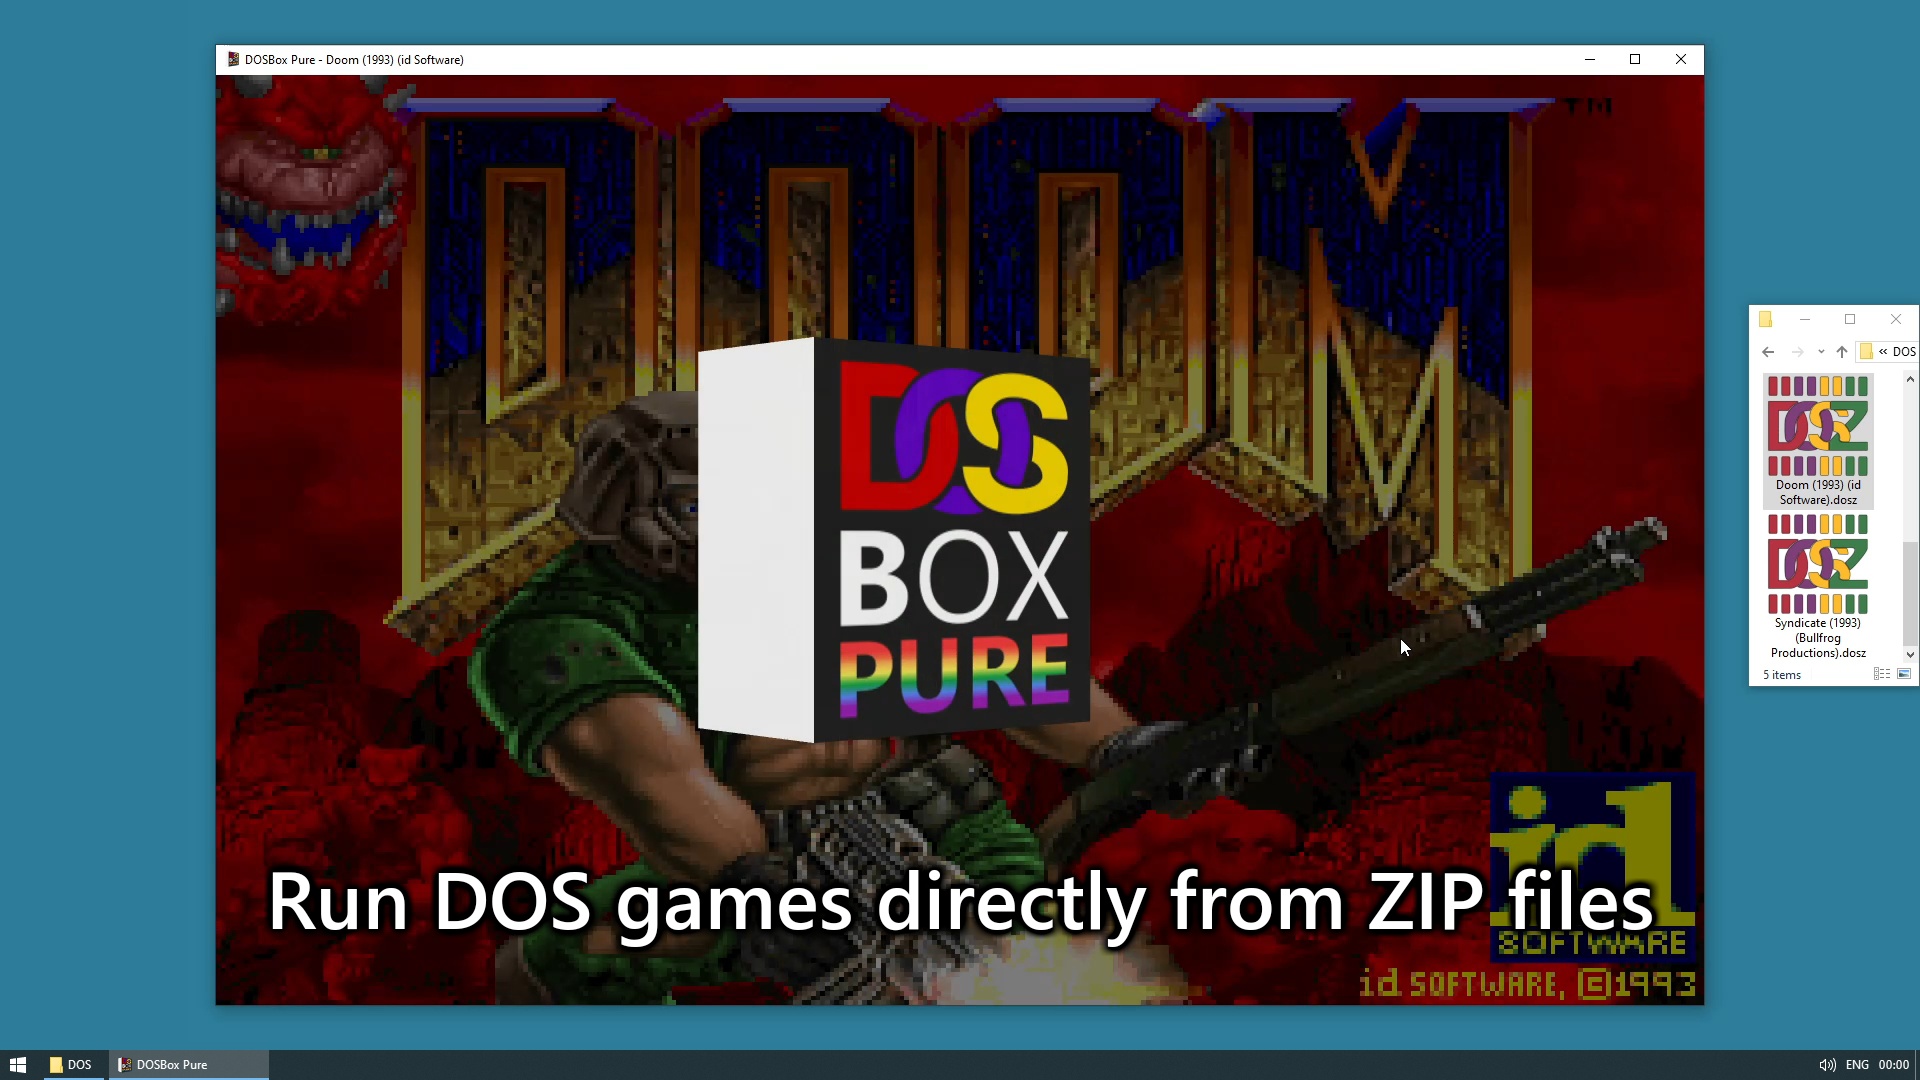 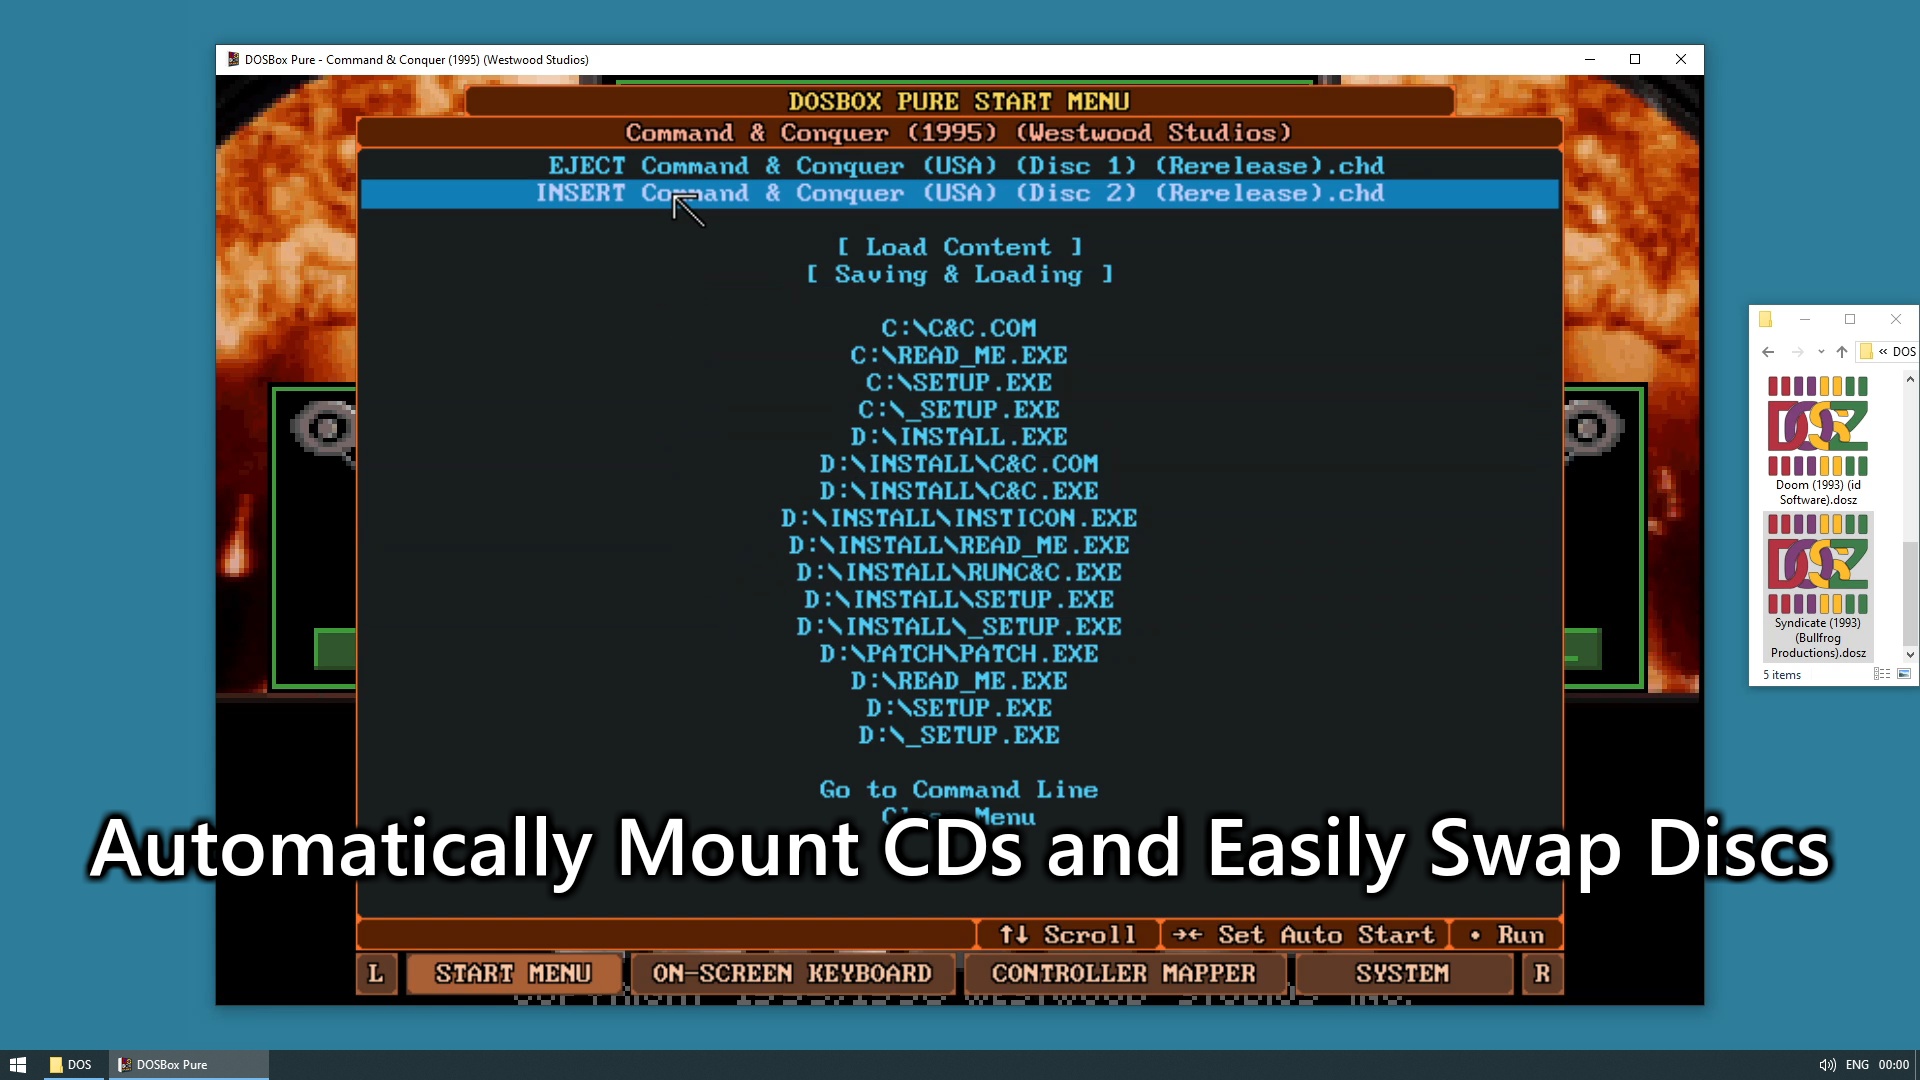 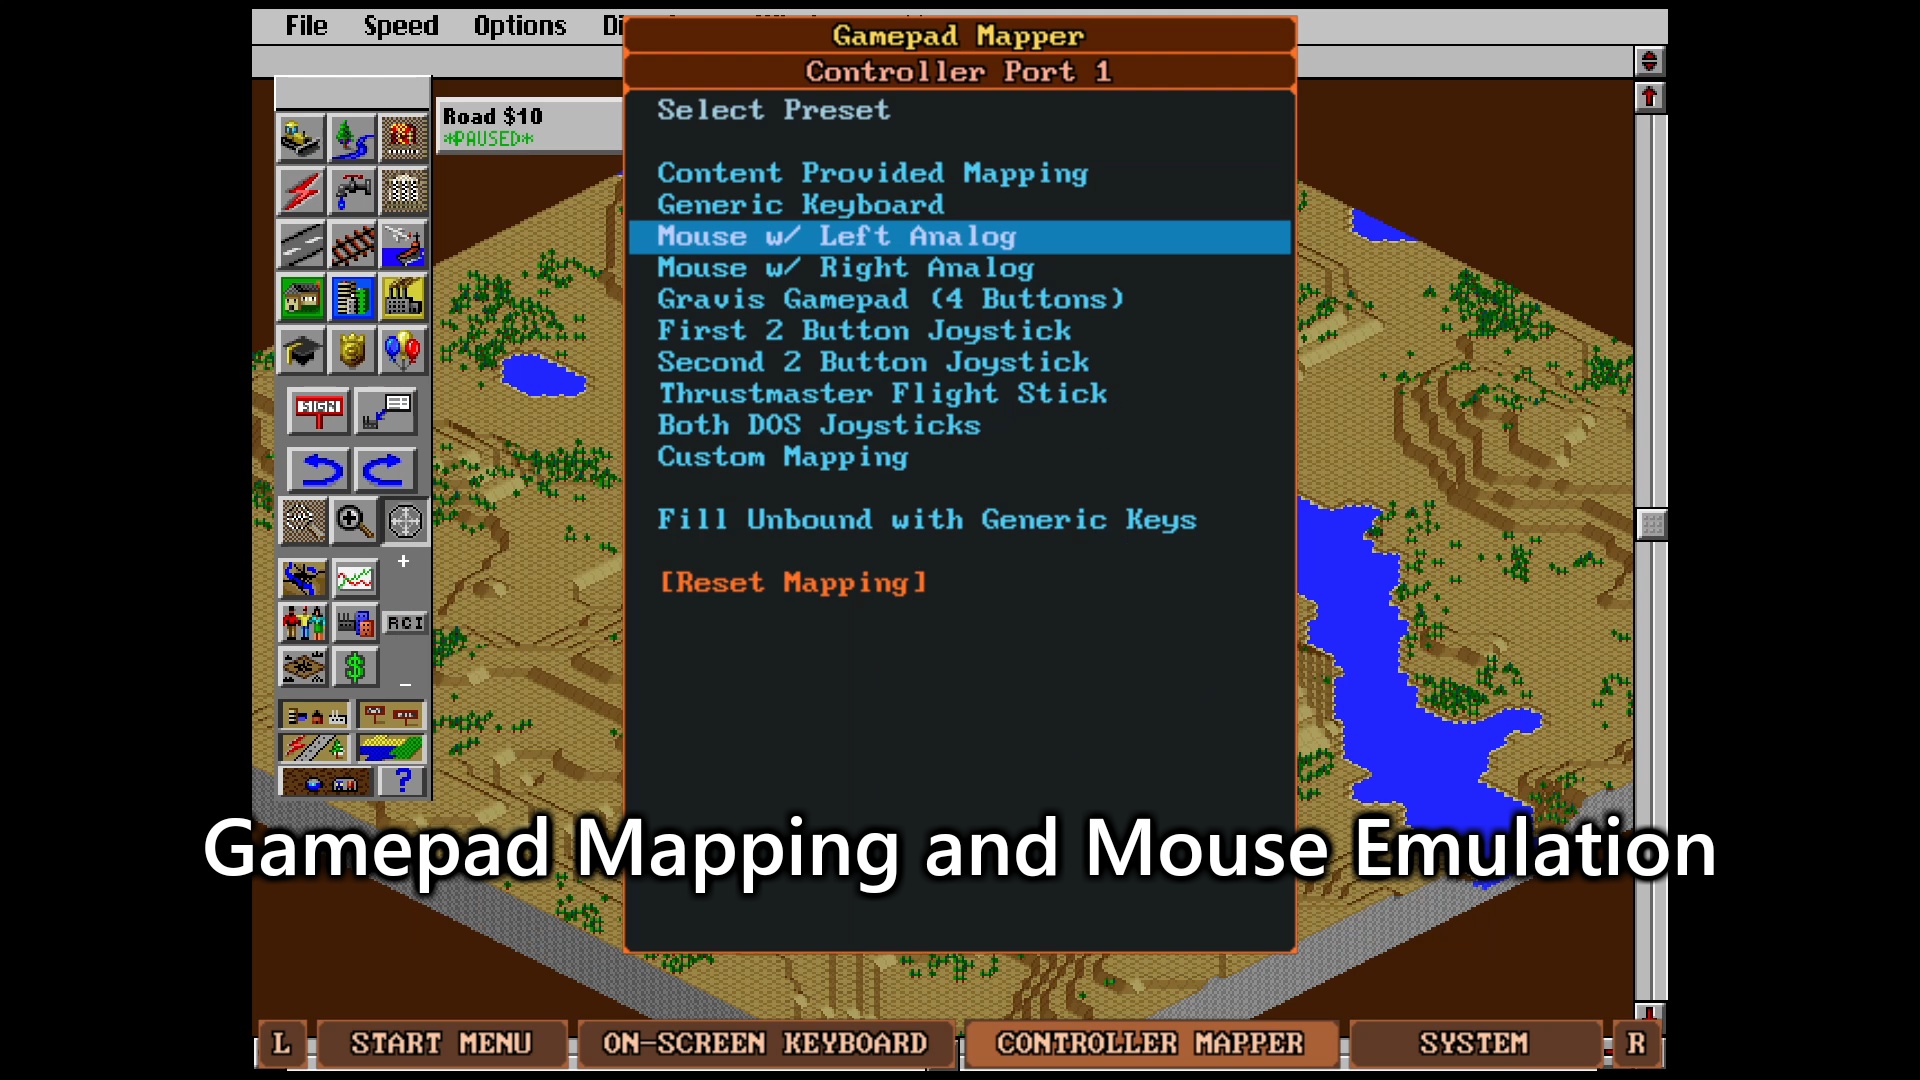 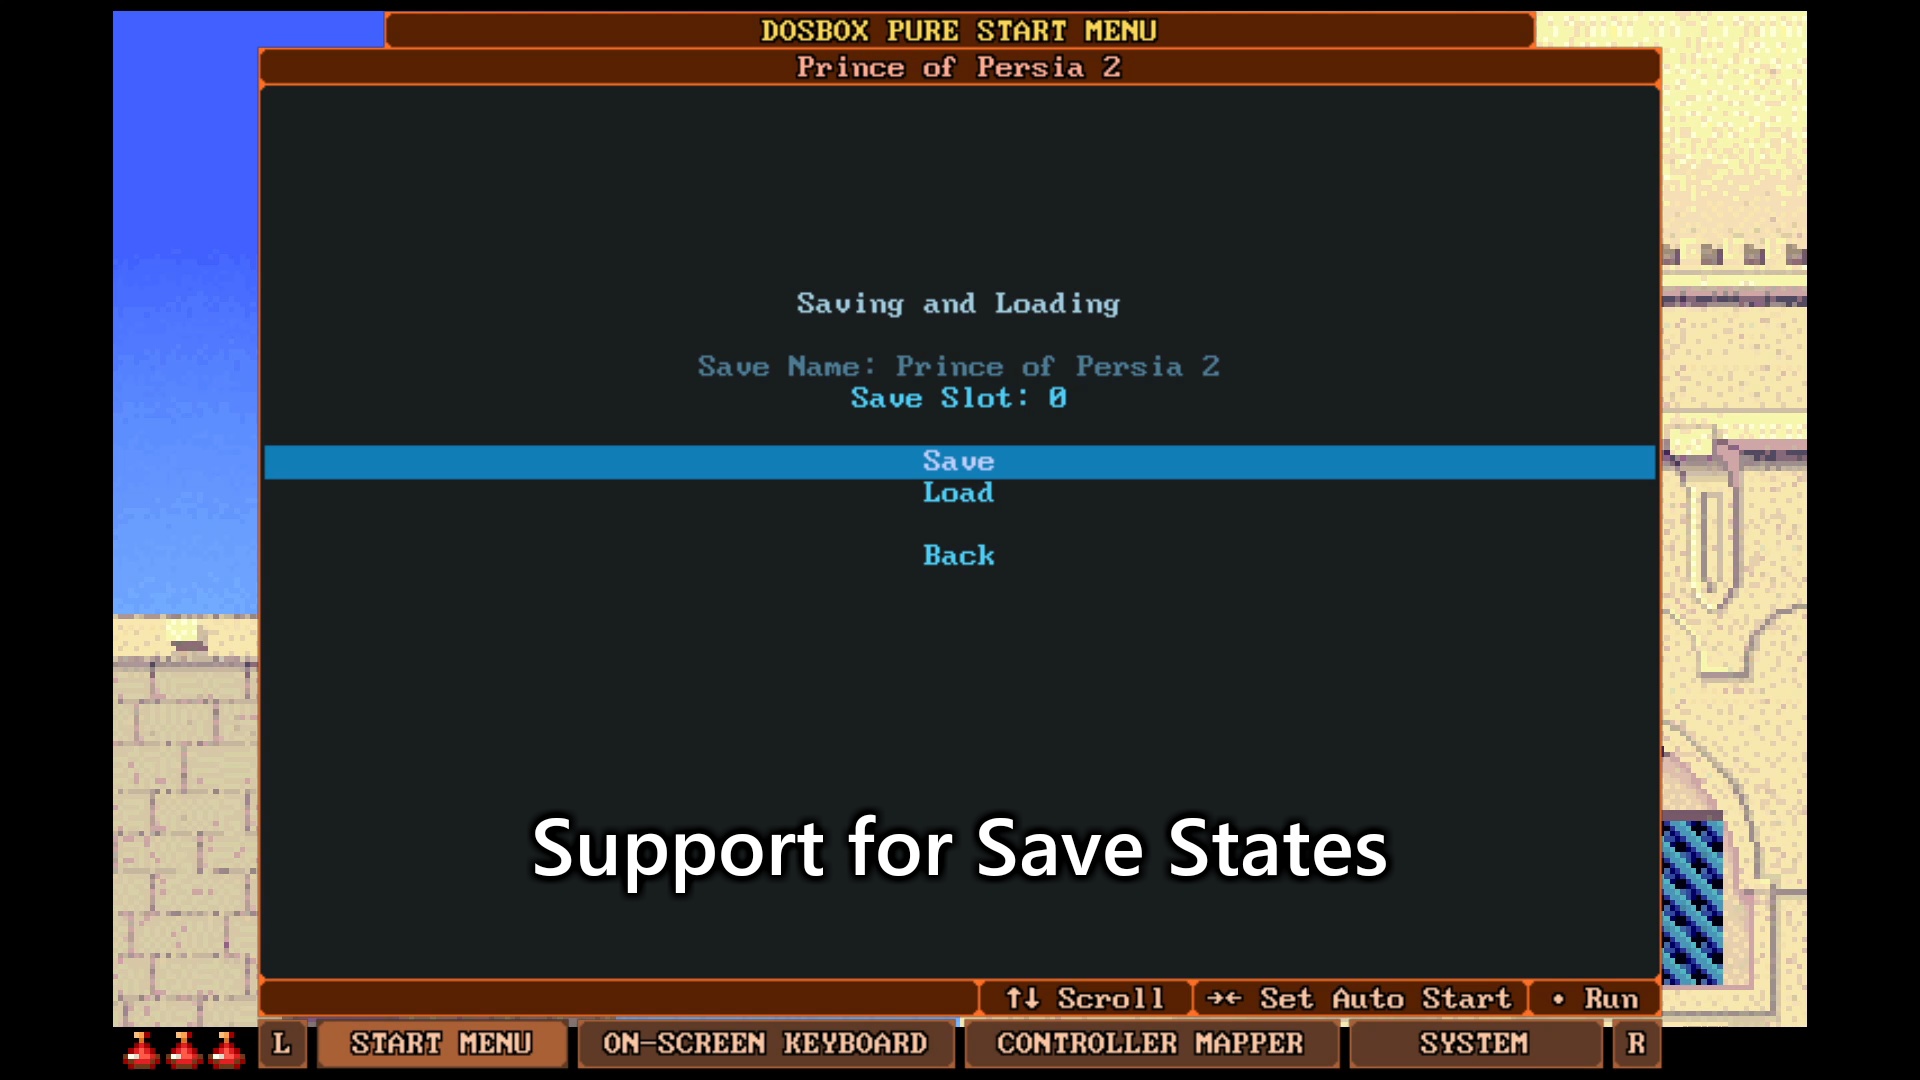 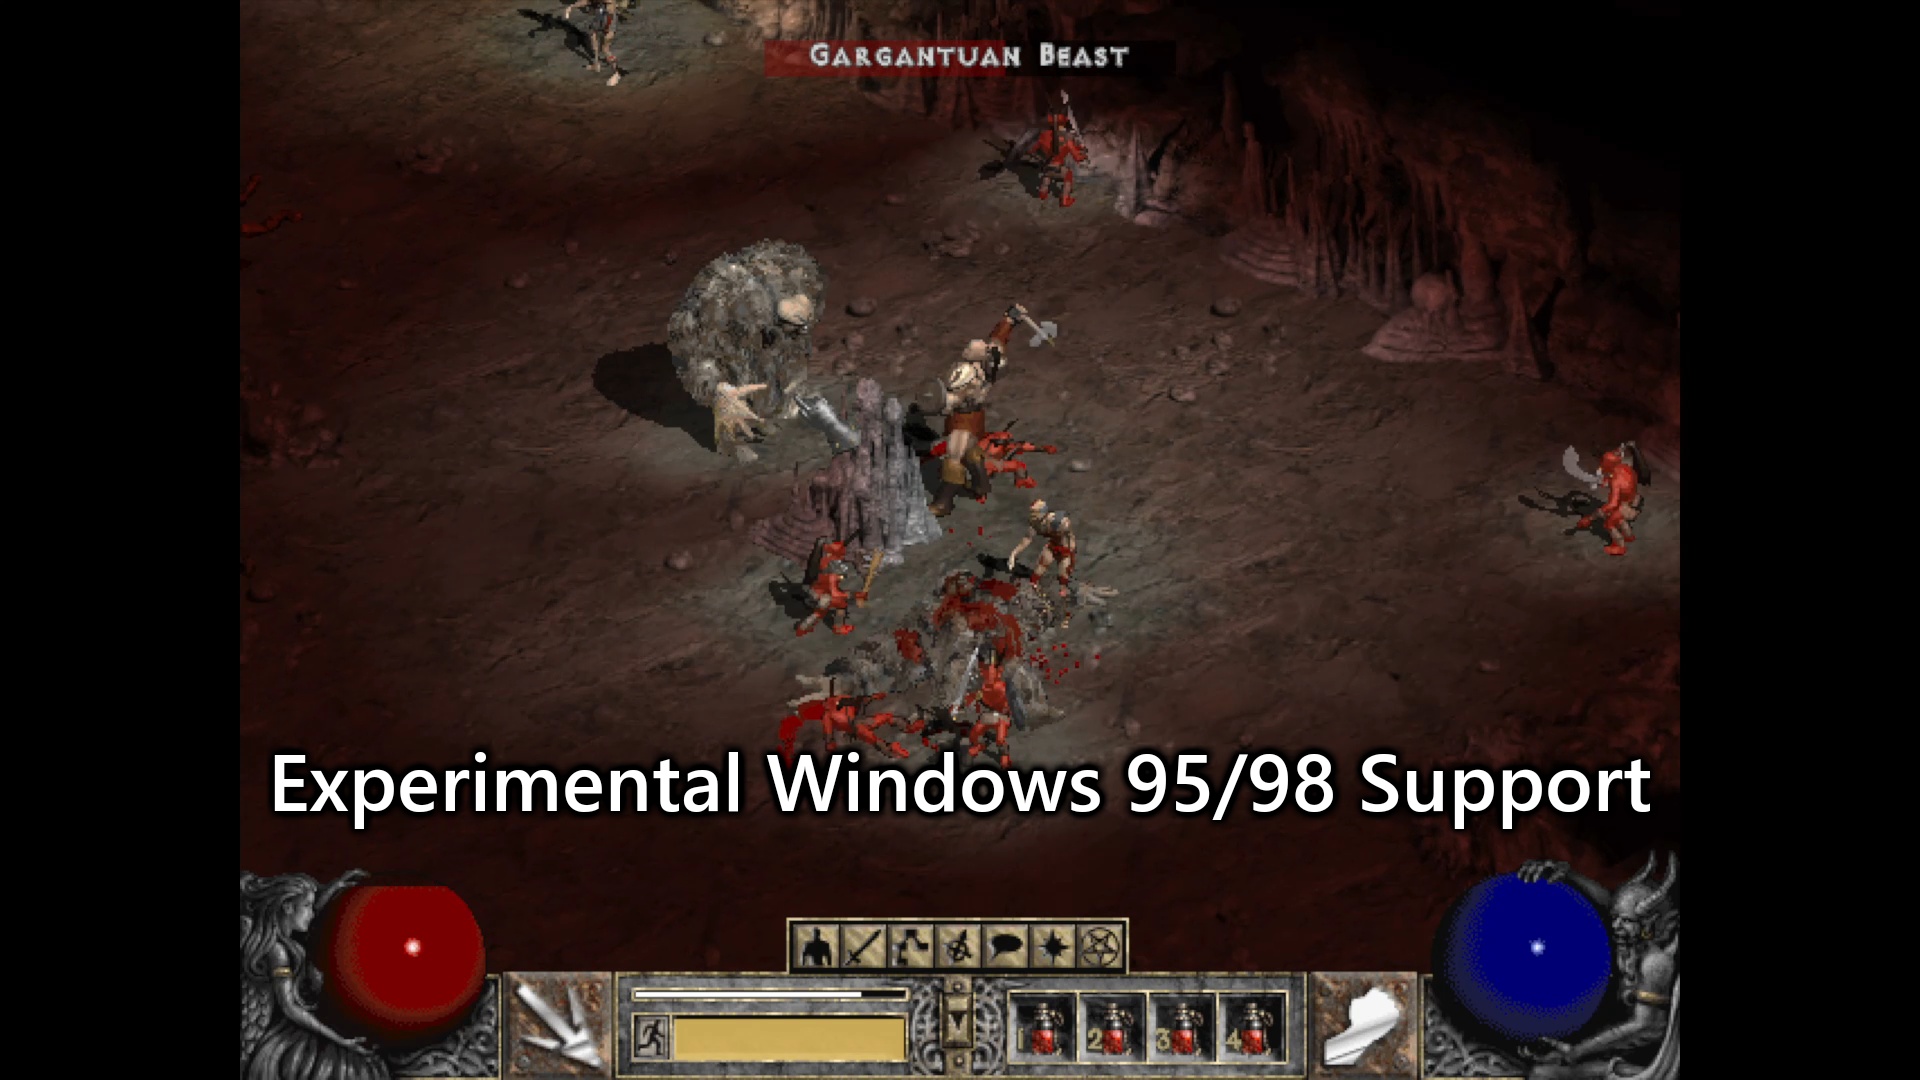 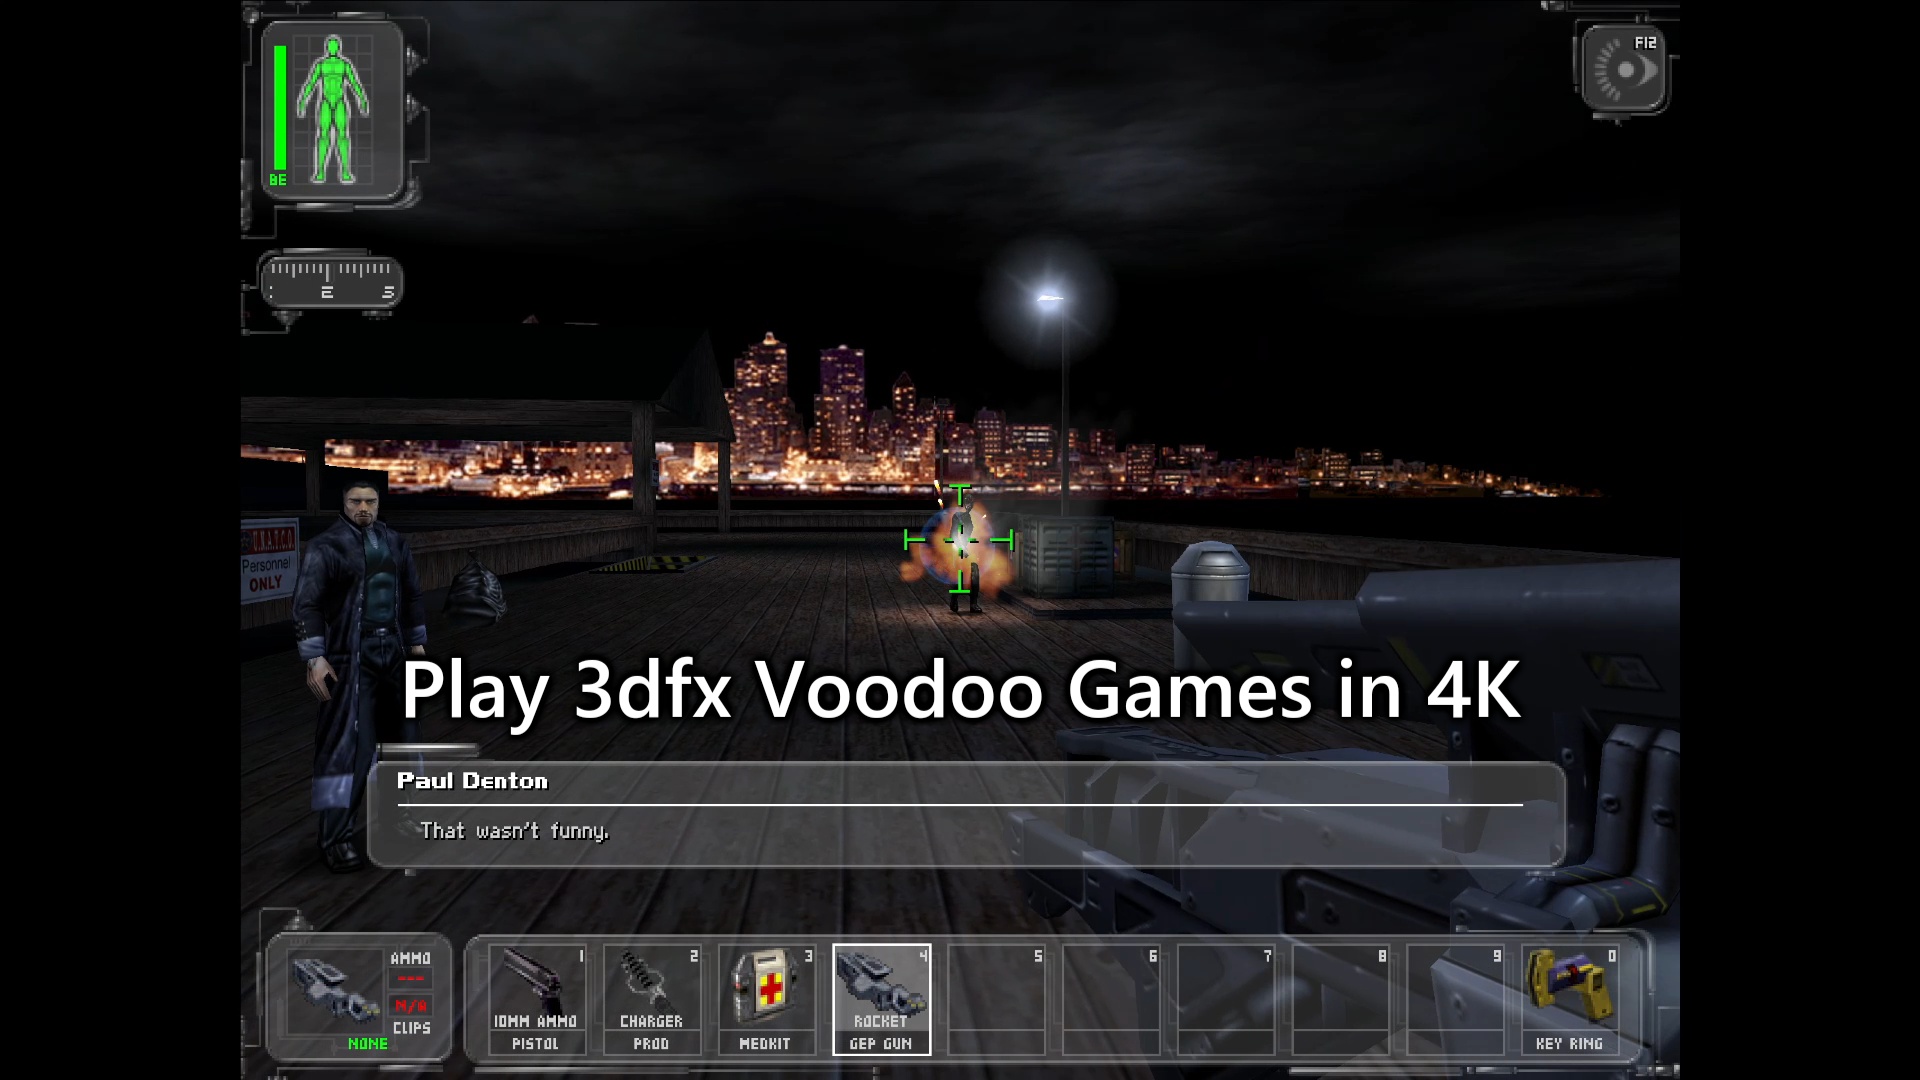 |
Features
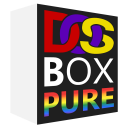
Load Games from ZIP
DOSBox Pure can load games directly from ZIP files without the need to extract them.
Store Modifications in Separate Save File
Changes made to a loaded ZIP file will be stored as a separate ZIP file into the saves directory.
If a game is loaded directly without using a container like ZIP or ISO the saves directory is not used.
Mount Disk Images from Inside ZIP Files
CD images (ISO or CUE) and floppy disk images (IMG/IMA/VHD/JRC) can be mounted directly from inside ZIP files.
The system will automatically mount the first found disk image as the A: or D: drive.
Additional disks can be loaded or swapped by using the start menu.
Start Menu
This is the first screen that appears after loading a game. It offers a gamepad controllable list with all executable files of the loaded game. In addition it can load new content and swap which floppy disk or CD is inserted.
By using the tabs at the bottom, you can view the Gamepad Mapper, the System Settings and while a game is running access the On-Screen Keyboard.
While a game is running, you can open the menu again by pressing CTRL+F12 or L3 on the gamepad (usually by pushing in the left analog stick). The keyboard hotkey can be modified in the System Settings and the gamepad button can be changed in the Gamepad Mapper.
System Settings
By switching to the SYSTEM tab in the start menu you will find all program and emulation settings divided into various categories. Each setting has a list of options and a detailed description next to it.
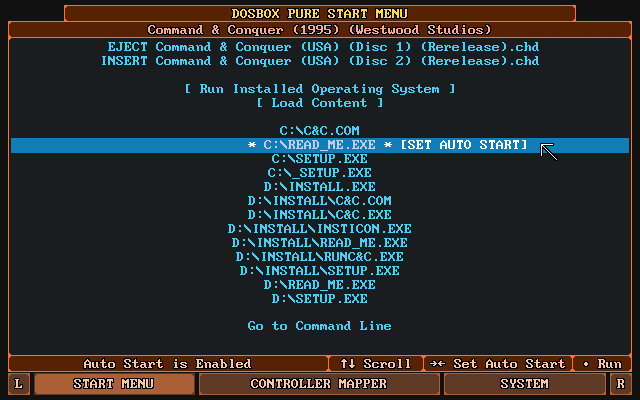
Auto Start
While in the start menu, you can press right to set an item as the default which will skip the menu the next time the same content is loaded.
By pressing right multiple times, a number of frames can be specified that will automatically be skipped on start.
This can be used to skip over loading screens or start-up sequences.
If there is only a single choice, the menu will not show and directly run the only executable file.
On-Screen Keyboard

By pressing L3 on the gamepad (usually by pushing in the left analog stick) the menu will open.
Then you can use the L and R buttons to switch to the On-screen keyboard tab. It is also possible to use the
Input > Use L3 Button to Show Menu option to default to the keyboard when first pressing L3.
The cursor on the On-screen keyboard can be controlled with the controller (or mouse or keyboard)
and L2/R2 will speed up or slow down the cursor speed.
If the cursor is moved above the middle of the screen, the keyboard will move to the top.
The L3 button can be changed with the Gamepad mapper and there is also a core option to remove it.
Automated Controller Mappings
When a game is loaded, DOSBox Pure will try to detect the game and apply a controller mapping.
To see the applied mapping, check Controller Port 1 under the "Controller Mapper" tab of the start menu.
It will show Mapping: . Additionally you can set the core option
Input > Advanced > Automatic Game Pad Mappings to Enable with notification on game detection.
Mouse Emulation
Under the "Controller Mapper" screen in the start menu there are 2 mouse emulation modes available by
switching the Preset setting of any port. There is Mouse with Left Analog Stick and
Mouse with Right Analog Stick.
When choosing "left stick", the face buttons (B/A) will be used as left/right mouse buttons.
For the right stick the shoulder buttons L/R will be used as left/right mouse buttons.
The X button is the middle mouse button and L2/R2 can be used to speed up or slow down mouse movement.
There is also the core option Input > Mouse Sensitivity to increase/decrease mouse movement speed.
The behavior of a real mouse or touch screen can be controlled by the Input > Mouse Input Mode option.
- Virtual mouse movement (best used when mouse is locked to the window)
- Direct controlled mouse (not supported by all games)
- Touchpad mode (drag to move, tap to click, etc., best for touch screens)
- Off (ignore mouse/touch inputs)
In Windows 3.x it is possible to use this driver for direct controlled mouse support.
Keyboard Emulation
For games that don't have automated controller mappings or are not detected successfully the core will map generic keyboard keys to all buttons. Use the "Controller Mapper" screen in the start menu or the On-screen keyboard to freely customize all the mapped buttons.
Joystick Emulation
There are multiple DOS era joysticks available as mappings under the "Controller Mapper" screen in the start menu.
Gravis GamePad (4 Buttons), First 2 Button Joystick (2 Axes), Second 2 Button Joystick (2 Axes),
ThrustMaster Flight Stick (3 axes, 4 buttons, 1 hat) and Both DOS Joysticks (4 axes, 4 buttons).
These can be assigned to any port and the button layout can be freely remapped.
Gamepad Mapper
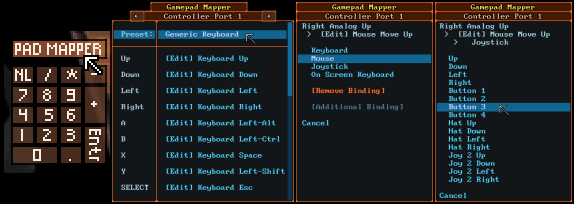
If you need even more customization of the controls than provided by the Automated controller mappings, or the various presets for mouse, keyboard and joysticks you can use the gamepad mapper.
To open it, select "CONTROLLER MAPPER" in the start menu or click the "PAD MAPPER" button in the On-screen keyboard.
It is available any time in-game and changes are immediately saved and applied when closing the mapper. Up to 4 functions can be mapped for any button/direction of the gamepad. A mapping can be to any function of the 3 emulated input devices: keyboard, mouse or joystick.
The mapping is saved to a DOS file named "C:\PADMAP.DBP" which will be stored in the save file or next to the loaded program (when running without ZIP/DOSZ).
Installing an Operating System
When loading a content that contains a bootable CD-ROM image, the start menu will show an additional option
[ Boot and Install New Operating System ]. Additionally it will also show when both a CD-ROM image and a
floppy disk image are loaded, so non-bootable install CDs can be used as well.
With this option a hard disk image of selectable size (between 8 and 1024 MB) can be created after which
the CD-ROM or floppy disk image will boot to install the operating system. Once the installation has completed,
loading any content (for example a ZIP file) will have the option [ Run Installed Operating System ] to boot
the created hard disk image as the C: drive and with the loaded content becoming the D: drive. If there are
any CD-ROM images available they will appear as the E: drive.
There are two core options related to this feature:
System > Advanced > OS Disk Modifications: When running an installed operating system, modifications to the C: drive will be made on the disk image by default. Setting it to 'Discard' will never save any changes made on C: but allows the content to be closed any time without worry of file system or registry corruption. The third option 'Save Difference Per Content' will store any changes made to the C: drive into a file in the 'saves' directory next to the program, but the OS disk image must never be modified again once used, otherwise existing differences become unusable.System > Advanced > Force Normal Core in OS: If you encounter program errors or crashes inside the installed operating system, this option can be used to switch to a more compatible but slower mode. The option can be toggled on and off as needed.
The operating system will detect a NE2000 networking card which will not be able to connect to the real internet.
To avoid slow boot times, make sure to configure it to use base address port set to 0x300 and base IRQ set to 10.
In Windows 95 or 98, the keyboard gets detected as "PC/AT Keyboard (84-Key)" which can lead to some issues with arrow keys and others. To fix it open the "Device Manager", go to the keyboard and run "Update Driver". Then by using "Display a list of all the drivers" and "Show all hardware" you can find and install the full keyboard driver "Standard 101/102-Key or Microsoft Natural Keyboard" which is compatible. Make sure to reboot after installing it.
It is also possible to create save states while running an installed operating system. This can be used to skip the startup sequence or even jump directly to the title screen of a game. Make sure to load the same operating system and do not modify the loaded ZIP file in any way otherwise the operating system will be very confused and most likely crash. To make things easier, set the operating system to auto start so it starts together with the content, skipping the start menu.
3dfx Voodoo Emulation
The core includes emulation of a 3dfx Voodoo PCI card. Compatible DOS games should work out of the box. If running an installed operating system like Windows 95 or Windows 98, you can get the required drivers from this site. Download "3dfx Voodoo1 V3.01.00" and launch voodoo1-30100.zip with the core, then run the operating system and install the driver via the control panel from the files on the D: drive.
There are a few core options related to this feature:
Video > 3dfx Voodoo Emulation: By default a compatible 8 MB memory card with one texture mapping unit is emulated. It can be changed to an experimental 12 MB dual TMU card, a 4 MB card or support can be disabled entirely.Video > 3dfx Voodoo Performance Settings: By default the core will use fast OpenGL hardware acceleration to render 3dfx graphics. This setting can be used to switch to software rendering with a more faithful emulation but at much higher CPU cost.Video > 3dfx Voodoo OpenGL Scaling: Use this setting to increase the render resolution of the OpenGL rendering.
MIDI Playback with SoundFonts or MT-32
If DOSBox Pure finds one or more .SF2 sound font files in the system directory, one of them
can be selected via the Audio > MIDI SoundFont core option. This sound font will then be used to play General Midi and Sound Canvas music.
If the system directory contains a pair of _control.rom and _pcm.rom files, an MT-32 synthesizer can be emulated with them.
Alternatively if the content mounted to the C: drive contains a file named DOSBOX.SF2 or MT32_CONTROL.ROM/MT32_PCM.ROM, it will be used as a per-game override to the core option.
Save States
DOSBox Pure can save the state of the emulation to disk. Use the "Saving & Loading" item in the menu available while running a game. There are 10 slots available for each content. Using the quick save/load hotkey will use the slot number active in the menu.
Make sure to test it in each game before using it. Complex late era DOS games might have problems.
Be aware that states saved with different video or cpu settings are not loadable.
Before loading a state, you need to launch the same game that was running while it was saved.
Shared System Shells (like Windows 3)
If DOSBox Pure finds any .DOSZ zip files in the system directory, they will
get listed in the start menu under a sub-menu with the name [ Run System Shell ].
When a shell is selected, DOSBox Pure will underlay the content of the shell's DOSZ zip file as the base of the file system of the C: drive. This way, one installation of (for example) Windows 3.1 can be used for multiple games, keeping the Windows installation and games in separate ZIP files.
On startup it will look for any of the following files to automatically start the shell:
- C:\WINDOWS.BAT
- C:\AUTOEXEC.BAT
- C:\WINDOWS\WIN.COM
Booter Games
When loading a ZIP file which contains a floppy or hard-disk image or loading such a disk image directly,
the start menu will show an additional option [BOOT IMAGE FILE].
When selected, a list of system modes (emulated graphics card) will be shown and once a mode is selected,
DOSBox Pure will try to boot from the mounted image.
While running a booter game, the mounted disk can be easily swapped with the menu.
Loading M3U8 Files
If the core gets loaded with a .m3u8 file, all files listed in it will be added to the
disc swap menu. The first image will automatically get mounted as A: or D: drive depending
if it is a CD or floppy disk image.
CRT Filter
By using the Video > CRT Filter setting you can enable a CRT video filter which, once enabled,
will reveal further options to customize it.
Tips
Configuration File
The program uses a configuration file DOSBoxPure.cfg which it will create automatically.
Next to the configuration file, it will also create and use two folders saves (for game save data and save states) and system (for operating system images, SoundFonts2 and MT-32 ROM files).
On Windows it will by default use the folder DOSBoxPure.exe exists in but it can be changed by creating a folder called DOSBoxPure under the users Roaming AppData folder.
On Linux and macOS it will by default use a subfolder in the home folder but it can be changed by creating a file called DOSBoxPure.cfg in the current directory or next to the executable.
Furthermore, the saves and system folders can be set to a custom path by adding a new record to DOSBoxPure.cfg with the keys path_saves or path_system.
Loading a dosbox.conf File
If a .conf file gets loaded as the content, DOSBox Pure will mount the directory of that file as the C: drive and then use it.
Alternatively, a .conf file can get loaded automatically depending on the Emulation > Loading of dosbox.conf core option. There are two modes that can be enabled:
- "Try 'dosbox.conf' in the loaded content (ZIP or folder)" - Will load C:\DOSBOX.CONF automatically if it exists in the mounted ZIP or path
- "Try '.conf' with same name as loaded content (next to ZIP or folder)" - Will automatically load GAME.conf next to GAME.zip if it exists.
If there is a .conf file, DOSBox Pure will load the settings in that file and run the autoexec lines from it (if set).
Mount ZIP as A or D Drive
If you have a ZIP file you want to load as a fake floppy disk or fake CD-ROM, there are multiple options.
The easiest is to rename the file from .ZIP to .D.ZIP (to use the D: drive).
Another option is available inside DOSBox Pure with a new remount command that can be called with
REMOUNT C: D: to remount the C: drive to D:. This can for example be used in a startup batch file.
Change Disk Label with Label Command
DOSBox Pure by default uses the first word of the ZIP file as the label of the mounted disk.
Some games require a specific label on a floppy or a CD-ROM so DOSBox Pure offers a new command
to change the label of a mounted disk. For example, LABEL C: HELLO changes the label of the C: drive.
This label is not saved anywhere and needs to be reapplied on every launch so it's best to add the
command in a startup batch file.
You can run the MOUNT command to check all mounted disks and their disk label.
Keyboard Layout Defaults to US
The keyboard layout defaults to the US Layout (QWERTY).
If you need a different layout, you can change the core option Input > Advanced > Keyboard Layout.
Save File Handling
When modifications to the file system loaded from a ZIP file happens, modifications are written into
a separate save file. You can find these save files in the 'saves' directory next to the program.
Save files get re-written to disk a short while after a modification happens in the file system.
The bigger the save, the less often it will be written out.
Up to 1MB of total save data, it will be written out 2 seconds after the last file modification.
Then gradually until at max 59MB and more, it will be written out 60 seconds after the last file modification.
Of course upon shutdown any yet unsaved changes are written out to disk.
Reading Large Files in ZIPs
When a DOS game opens a large file and wants to read some data from near the end of the file, DOSBox Pure needs to decompress the entire file to do that. This can be most noticeable when mounting CD-ROM images from inside ZIP files. Afterwards there is an index buffer which will be used to decompress random locations of the file and file access will be much faster. This index buffer is stored into the game save file to avoid having to slowly rebuild it every time the same game is launched.
Compile from Source Code
Check out the GitHub Project for source code and instructions on how to compile.
License
DOSBox Pure, as well as original DOSBox, is available under the GNU General Public License, version 2 or later.
If you plan to donate via PayPal, PLEASE consider doing it
directly to me via this link to avoid Itch taking away 50%. Thank you.
Download
Click download now to get access to the following files:
Development log
- DOSBox Pure Unleashed 1.0 Preview 610 hours ago
- DOSBox Pure Unleashed 1.0 Preview 5Feb 12, 2026